Create an Outside Living Space Under $500
Are you tired of Not being able to enjoy your backyard, because there is no shade? Do you love the Outdoors, but Not the Heat or Brightness from the Sun, Beating down on Your Face? Are you looking for an inexpensive DIY Outside Living Space? I have you COVERED, literally :). I will show you how to Create an Outside Living Space Under $500.
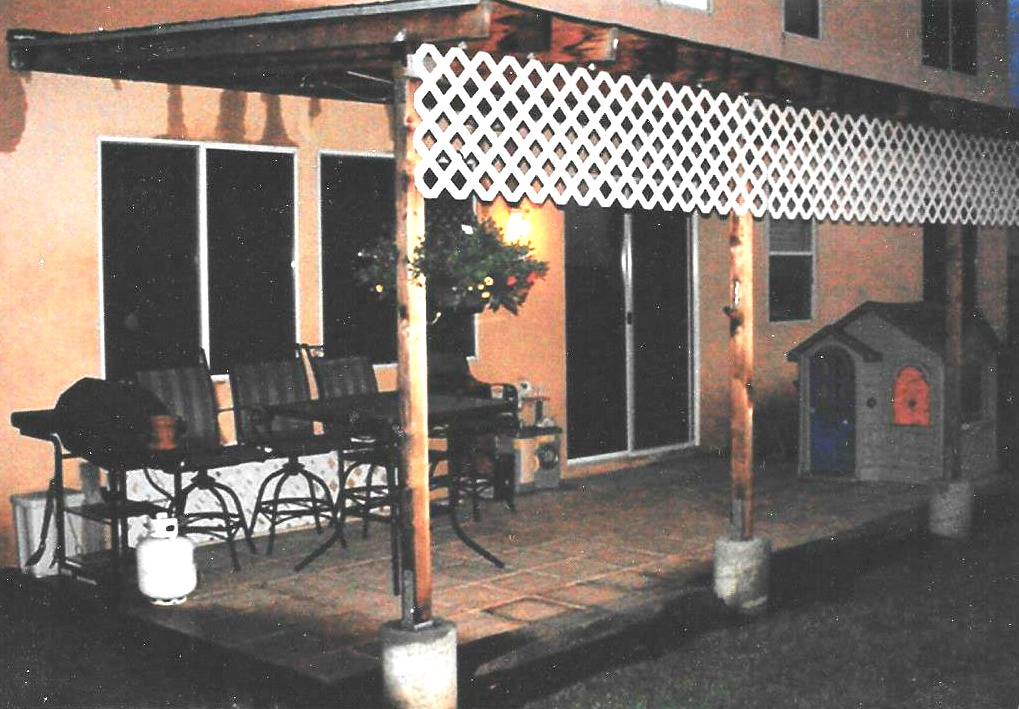
Welcome! I am so excited, for my first outside Tutorial. Yes, today I welcome you to my backyard in Sunny Southern California. This is our first home aka New Construction. I will show you how my husband and I did our first DIY project, a Stone Patio.
I remember subscribing to the Handy Man magazine and scouring it, like we do with Pinterest. Since we weren’t super skilled or talented with BIG projects, (let’s just say we were real beginnings) we needed something simple. I found a Step by Step article on how to make a patio WITHOUT Pouring or mixing concrete! I was sold. All we needed were railroad ties, sand, and 12×12″ stones.
Create an Outside Living Space Under $500
Note: Before this project, we added sprinklers and grass, with the help of a friend. After this project, we added the awning, by paying another good friend. My hubby added the trellis and misters all around the awning, it was a great cool, shady, misty awning. This post only explains how to make the stone patio.
SUPPLIES:
- Railroad ties, according to the perimeter of your patio
- 12″ x 12″ stones according to your size of patio
- Sand
- Railroad Nails
- Spray paint
- Black plastic
TOOLS:
- Level
- Wheelbarrow
- Stomper for the sand
- Rake for sand
- Tile spacers
- 90 degree angle for stones
- Saw to cut rail road ties
- Sledgehammer for railroad ties
- Scissors to cut the plastic
- Yard broom
TUTORIAL:
First, clear your yard. Ours was already cleared since it was dirt.
Second, measure and mark your perimeter with spray paint.
Third, cut your rail road ties to fit with a hand saw.
Fourth, level your yard with a 90 degree level, make sure your railroad ties are LEVEL! Very IMPORTANT, so your tiles will fit in smoothly and evenly.
Fifth, lay your railroad ties in place and hammer the rail road nails into the railroad ties holes.
Sixth, lay the black plastic inside, then pour abut 3″ of sand in the entire perimeter.
Seventh, use the rake to spread the sand out.
Eight, use the Stomper to make sure your sand is compact.
Ninth, use level to make sure the sand is level.
Tenth, place your stones on top of the sand, using the tile spacers and 90 angle level.
Eleventh, start laying the tiles vertically, with the tile spacers. You do NOT want the tiles touching each other, sand is going to go between the tiles to hold them into place. Continue laying all of the tiles,
Twelfth, pour the sand on top of the stones and use a broom to till in all the gaps. You can leave the spacers in between the tiles, if you laid them flat, or you can remove them, once you pour the sand in between the tiles.
Being outside in nature is good to revitalize our mind, souls, and bodies. However, nobody likes sitting directly under the sun, (unless you are sunbathing). The solution to being outside is having an outside living space that provides lots of shade and even some cool mist. Saving money by creating it yourself and finding an easy tutorial is Even better. Create your outside living space with a covered stone patio for under $500. It will take a weekend, then give you back a wonderful spot to hang at every day.


